Do you want to gain insights from Microsoft Clarity but don’t know how to integrate it with your Google Tag Manager?
You are in luck. We will show you how to set up Microsoft Clarity via Google Tag Manager in three ways.
Not only that, we will also guide our Shopify merchants on how they can install Microsoft Clarity with Analyzify.
{{cta(‘168131603346′,’justifycenter’)}}
Get in touch to avail yourself of our Google Tag Manager Consultancy services.
How to Setup Microsoft Clarity via Google Tag Manager?
Install Microsoft Clarity On Google Tag Manager
- Go to Microsoft Clarity > Settings > Setup, select Google Tag Manager Integration, and click the Finish setup button.

- Sign into Google Tag Manager, complete Clarity verification to publish with GTM, and choose Allow to give permissions.
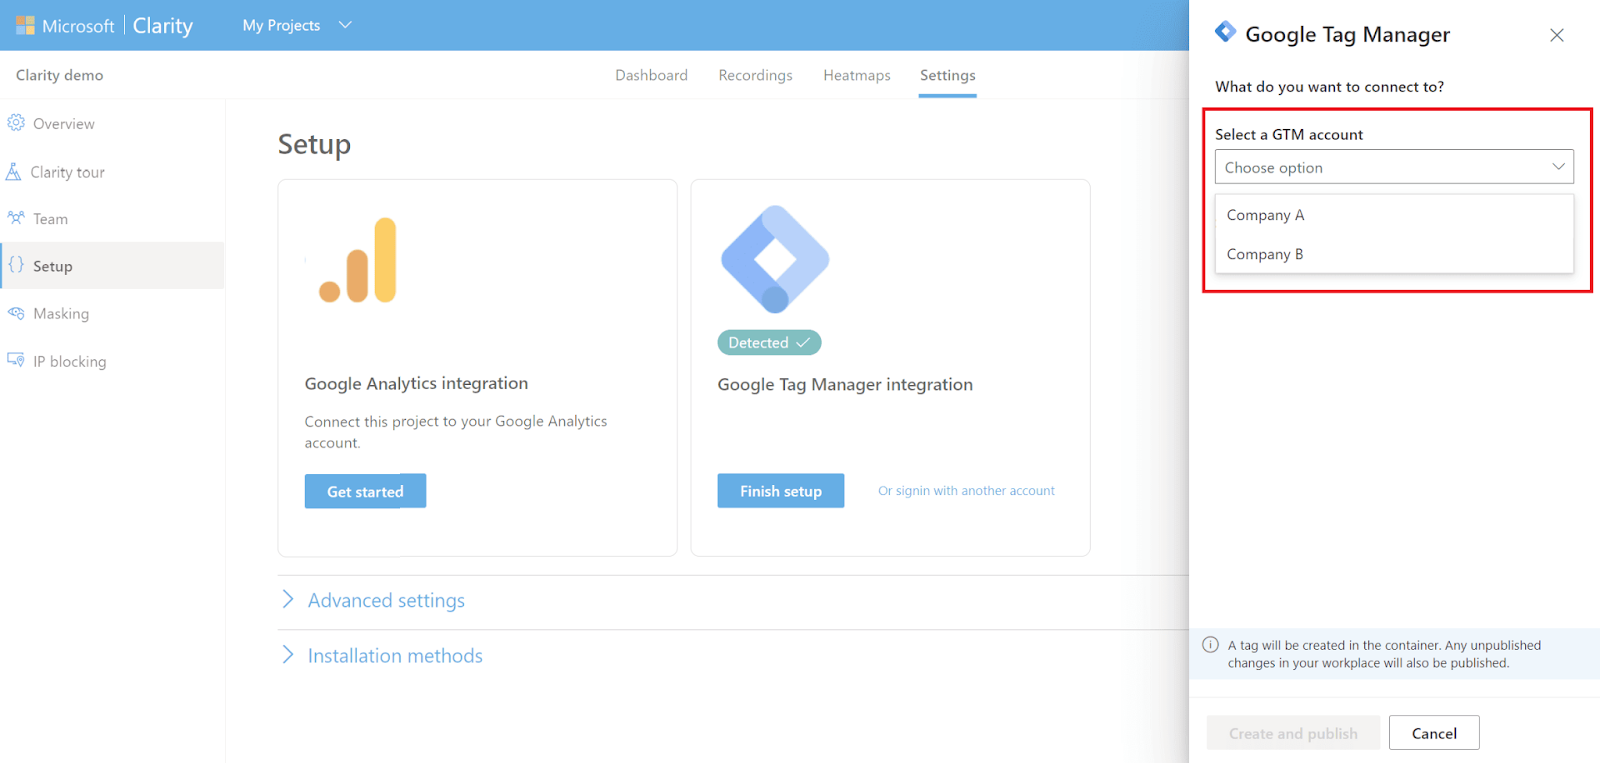
- Go to the Google Tag Manager panel at the top right corner, and click to choose the desired account and the desired container from the drop-down menu.
- Click Create and publish at the bottom of the panel.

The Microsoft Clarity Account is set; the Clarity Settings will appear next.
Install Microsoft Clarity Using The Clarity Google Tag Manager Template
- Go to Google Tag Manager and click New Tag.
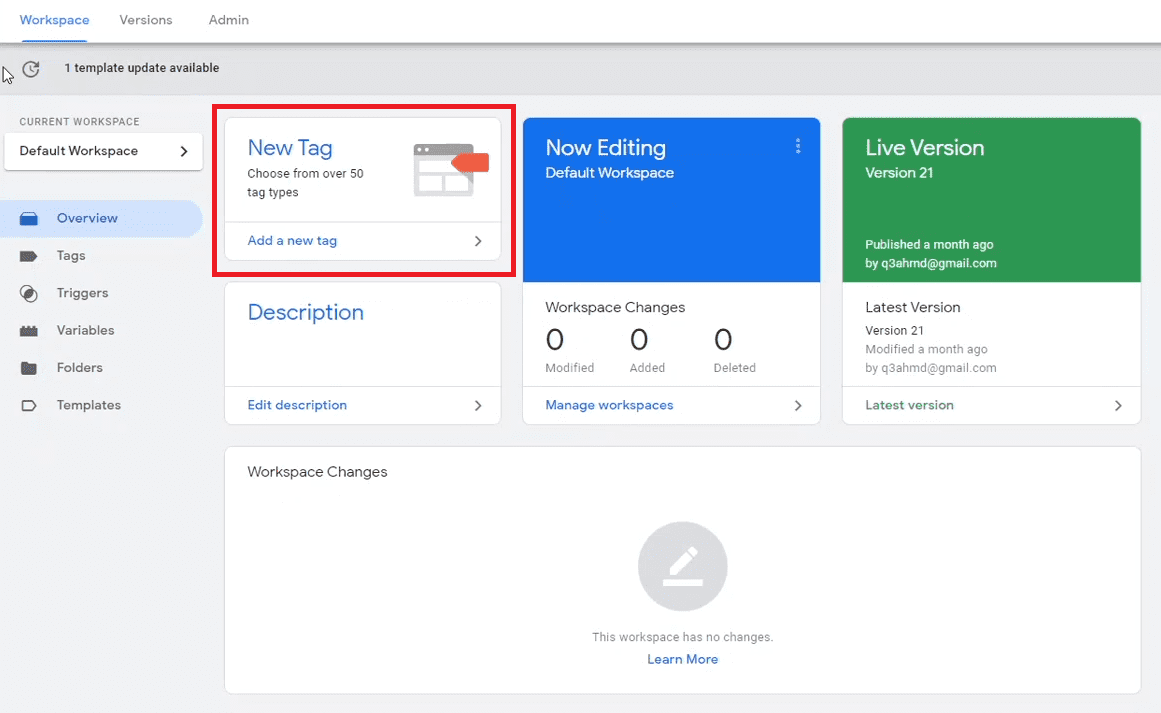
- In the opening window, rename it Clarity Tag.
- Click Tag Configuration, and the Choose tag type panel appears; click Discover more tag types in the Community Template Gallery.
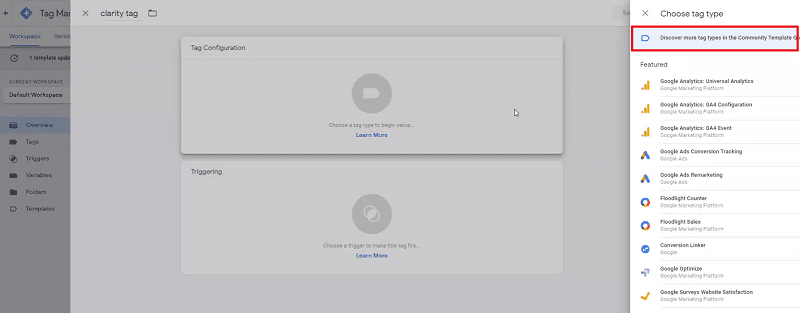
- Import Tag Template will appear; type Clarity in the search bar, and select Microsoft Clarity – Official from the options.
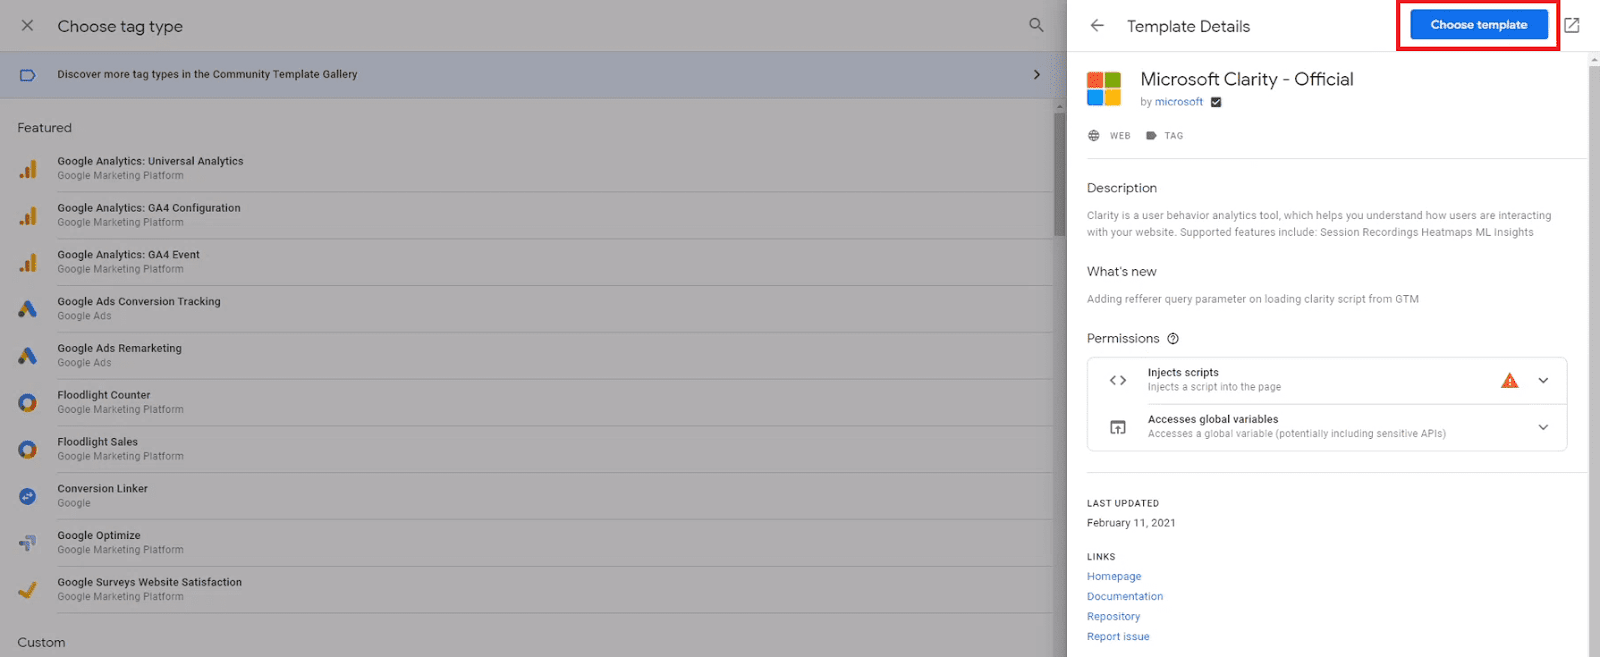
- Template Details appear, click Add to Workspace, and Tag Configuration will appear.

- Go to https://clarity.microsoft.com/projects in a new tab, click the Settings icon, and the Overview tab appears; copy the Project ID.
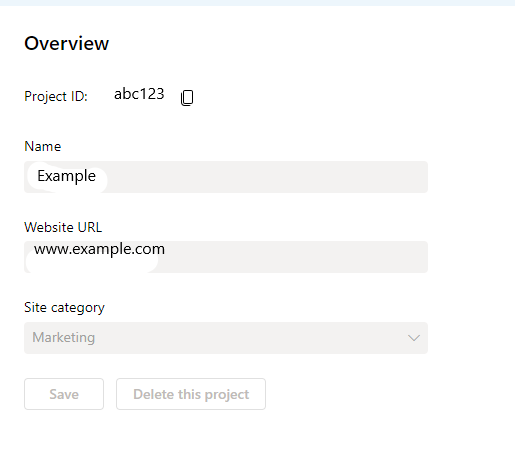
- Paste this ID into the Clarity Project id on the Tag Configuration.
- Scroll down, click Triggering, Choose a Trigger panel, and select the All Pages option.
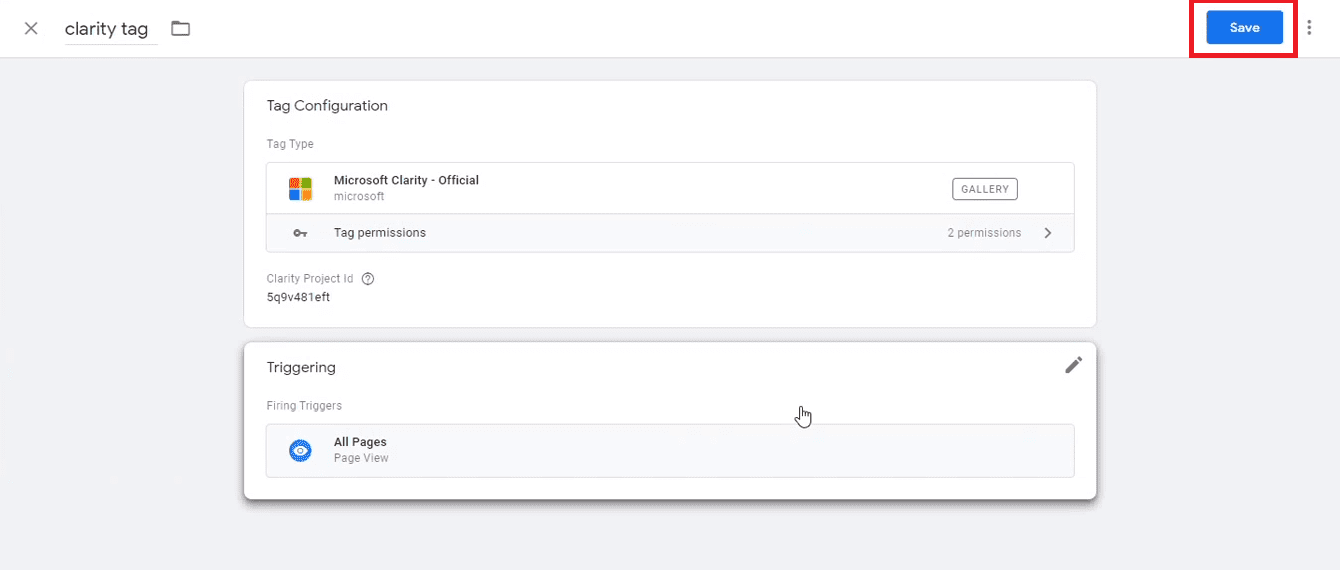
- Review and click Save.
- Click Publish in the Submit Changes panel.
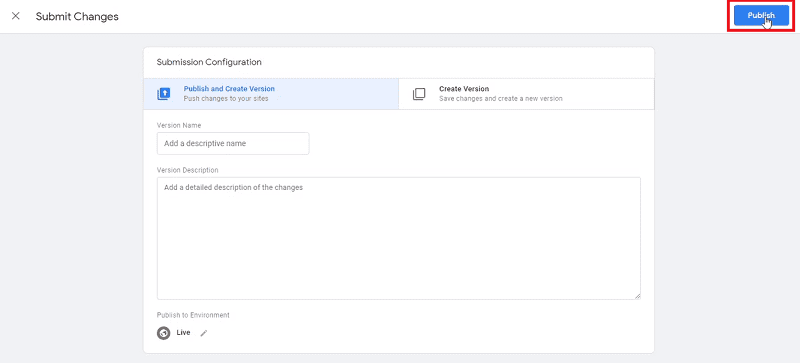
Congratulations, you have successfully integrated Google Tag Manager with Clarity.
Install Microsoft Clarity Manually With Google Tag Manager
- Go to Google Tag Manager > Tags, and click New.
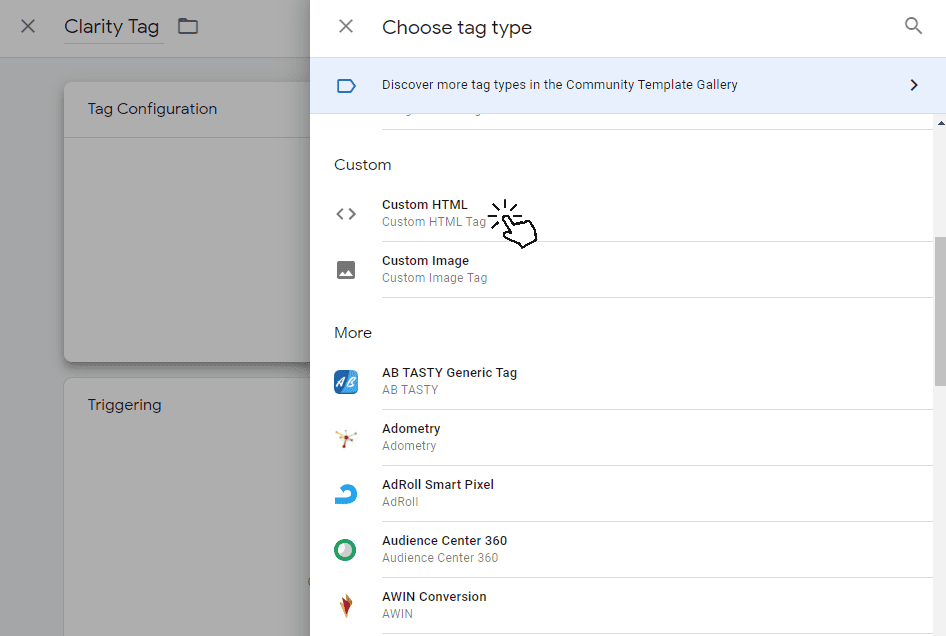
- Name the new tag as Clarity tag > click the Tag Configuration, choose Custom HTML in Choose tag type.
- Go to Clarity > Dashboard > Settings > Setup > Installation methods > Install manually > Get tracking code.
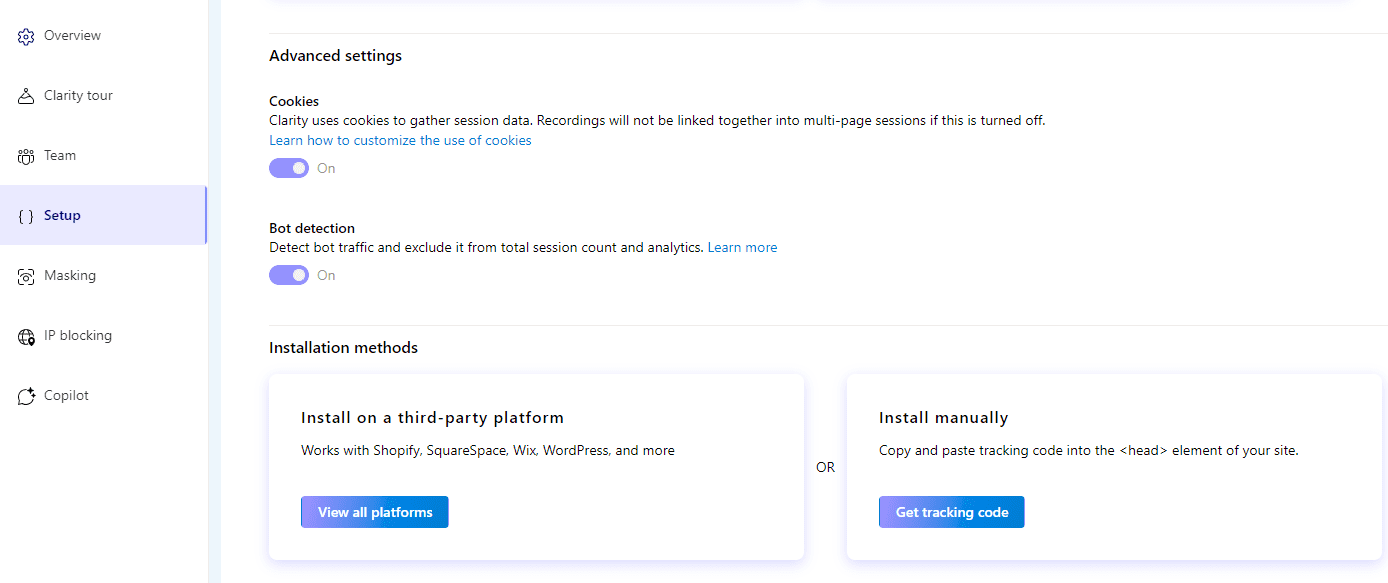

- Click Copy to clipboard, go to the Tag Configuration page in Google Tag Manager, paste the code in the HTML box, and hit Save.
- Click Add Triggers in the No Triggers Selected popup, and select All pages on the Choose a trigger page that appears.
- Review and click Save.
Install Microsoft Clarity With Analyzify via Google Tag Manager
Businesses on Shopify rely on Analyzify for their analytics needs. They can integrate Analyzify with Clarity by using the following steps.
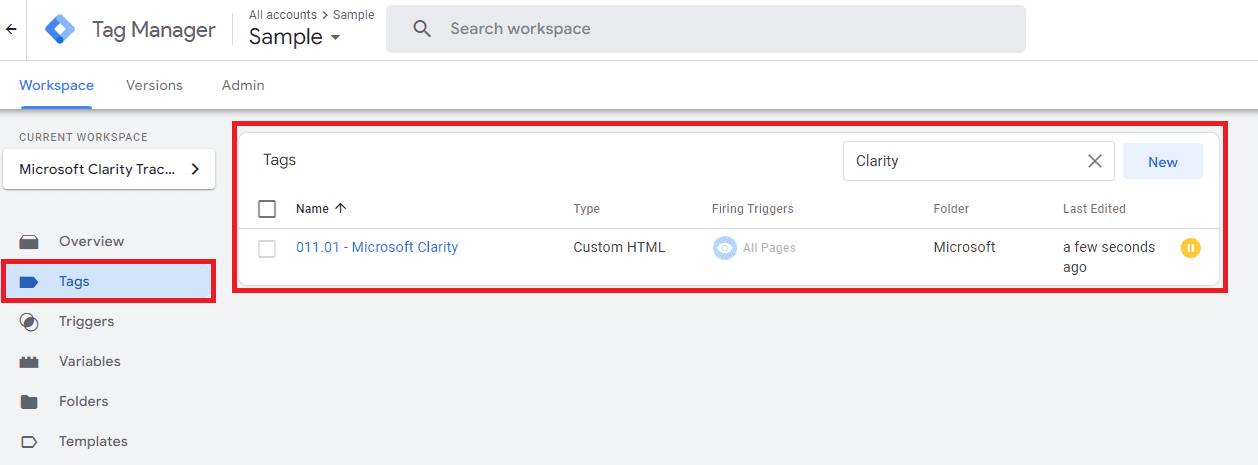
- Go to Google Tag Manager > Tags > search Clarity, and select 011.01 – Microsoft Clarity tag.
- Go to Clarity > Dashboard > Settings > Overview, and copy the Project ID.
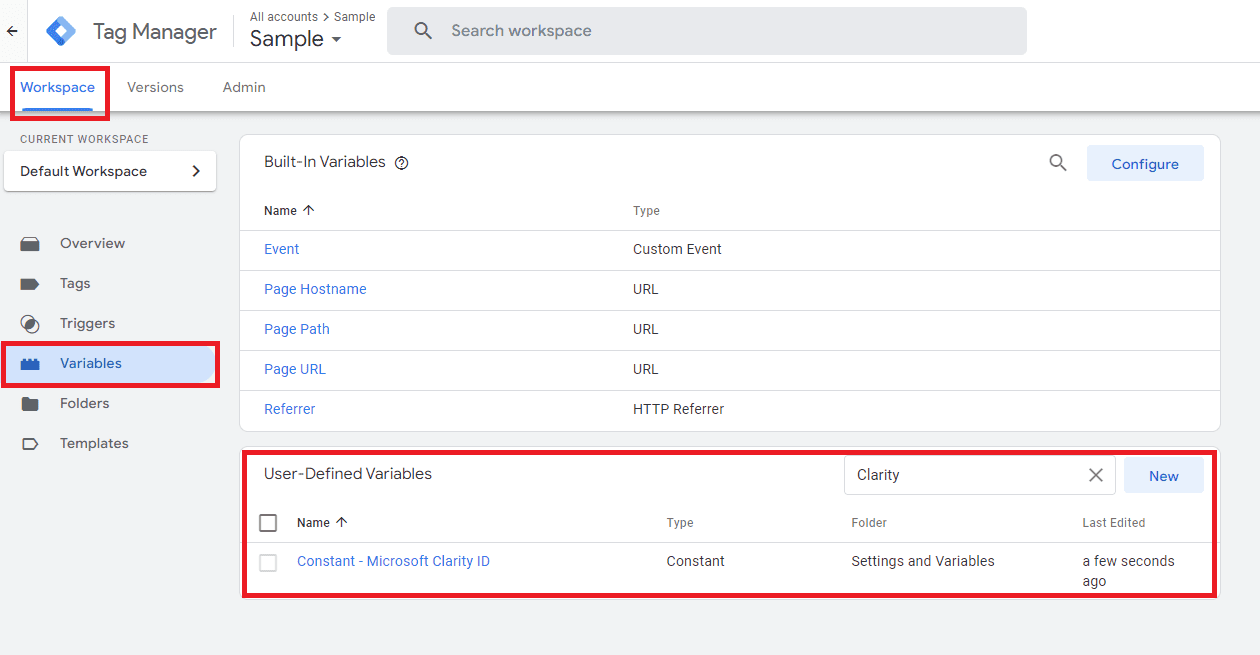
- Go back to Google Tag Manager > Workspace > Variables > User-Defined Variables > Constant – Microsoft Clarity ID, click it, paste the Project ID, and hit Save.
- Click Submit and Publish it to make it operational.
Conclusion
You can install Microsoft Clarity via Google Tag Manager to gain insights via the heat maps and a breakdown of user behavior.
To install Microsoft Clarity with GTM, try one of the three ways.
First, install Clarity on Google Tag Manager. Second, install Clarity using the Clarity Google Tag Manager Template.
And finally, you try to install it manually.
To install Microsoft Clarity with Google Tag Manager on Analyzify, install the Clarity tag on GTM and Publish it.
Interested in learning more, read our blogs here.


